


Did you see the Simply Elegant Detailed Pumpkins card I made a couple of weeks ago? You can view it here if you missed it.
I pulled out those lovely detailed dies again to create this beautiful Thanksgiving card. With the alternate colors, it has a much different look to it than the other card I made. The Gilded Gems are one of my favorite embellishments, and I love the way they look on this card!
To begin, emboss a 5 3/8″ x 4 1/8″ piece of Old Olive cardstock with the Bark 3D embossing folder. Color a piece of White Crinkled seam binding ribbon with a Dark Cajun Craze Stampin’ Blend marker and tie it around the bottom of the embossed cardstock. Adhere to the card base, which is an 8 1/2″ x 5 1/2″ piece of Very Vanilla cardstock scored at 4 1/4″.
Crop a large detailed die pumpkin from a scrap of Copper Foil paper. Crop the smaller pumpkin from a scrap of Pumpkin Pie cardstock. Stamp the detailed pumpkin image onto a scrap of Very Vanilla cardstock with Cajun Craze ink and crop with the corresponding die. Glue the copper pumpkin onto the cardfront. Adhere the other two pumpkins with dimensionals. Refer to photo for placement.
Crop two of the small pumpkin leaves from a scrap of Mossy Meadow cardstock and glue to the card front to the right of the pumpkins, over the ribbon.
Use Cajun Craze ink to stamp the greeting onto a scrap of Very Vanilla cardstock and crop with one of the Stitched Rectangle dies. Adhere to the top of the card front with dimensionals.
Add a large and two medium Gilded Gems to the card front. Refer to photo for placement.
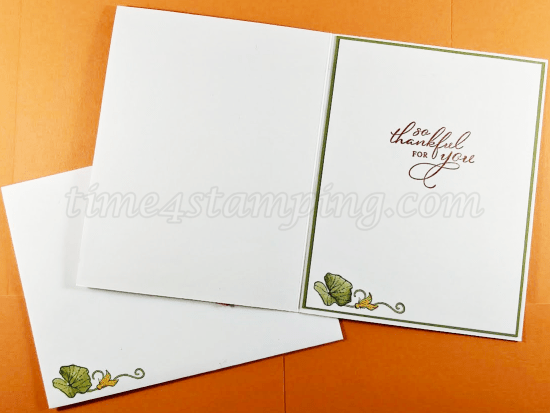
For the inside of the card, adhere another 5 3/8″ x 4 1/8″ piece of Old Olive cardstock to the inside of the card. Use Cajun Craze ink to stamp the sentiment onto a 5 1/4″ x 4″ piece of very vanilla cardstock. Stamp the small vine/flower image onto the lower-left corner of this piece with Mossy Meadow ink. Color the leaf and vines with Light and Dark Old Olive Stampin’ Blends and the flower with Dark Daffodil Delight. Adhere the completed piece to the inside of the card.
Decorate the lower-left corner of the envelope by repeating the vine/flower image as you did for the inside of the card.
Shop with me here if you would like to purchase any of the products needed to complete this card. Thank you for your support!
Product List


 Crinkled Seam Binding Ribbon")


